


Videos
Watch our videos
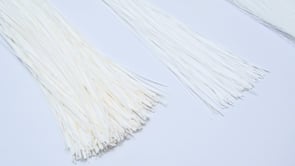
Measure hollow fiber membranes accurately with this step‑by‑step POROLUX™ video. Learn sample prep, mounting, and analysis for reliable pore size results.
How to measure hollow fiber membranes with POROLUX™
Get accurate, stable results — see the full workflow in action
Hollow fiber membranes can be challenging to measure because their structure, geometry, and fragility require precise handling.
This video shows how to prepare, position, and test hollow fiber samples using the POROLUX™ porometer, with small details that make a big difference in measurement stability.
Whether you're working in R&D, quality control, or evaluating new characterization methods, this clear demonstration helps you understand how to get reliable pore size data from even the most delicate hollow fibers.
What you can take away from this video
Learn how to trim and handle fragile fibers without cracking or flattening them.
See how to apply wetting liquid in a way that avoids over‑wetting.
Understand how fiber geometry affects sealing and alignment.
Discover the best practices to prevent leaks and measurement drift.
Get a realistic view of how POROLUX™ fits into membrane research and QC.
This video is ideal for ultrafiltration, microfiltration, hemodialysis fibers, gas separation membranes, and any application where precision pore size characterization really matters.
Fast overview of the workflow
Step 1: Prepare your hollow fiber sample
A clean, properly cut fiber ensures smooth wetting and stable sealing.
Step 2: Wet the fiber with the test liquid
The correct amount of wetting liquid is essential for accurate FBP and MPD values.
Step 3: Mount the fiber in the hollow‑fiber holder
The video demonstrates how to position the fiber correctly, ensure alignment, and achieve a tight seal.
Step 4: Start the measurement in the POROLUX™ software
Choose your method, verify your parameters, and begin the measurement.
Step 5: Evaluate your results
FBP, MPD, and the pore size distribution provide key insights into membrane integrity and performance.
Why pore size testing of hollow fiber membranes matters
Hollow fiber membranes are used in applications where precision is crucial — from filtration and separation to medical treatments. Pore size directly affects flow rate, selectivity, permeability, and overall membrane performance.
POROLUX™ porometers help you verify membrane quality, compare production batches, and ensure that your fibers meet the technical specifications required for your industry.
Porometry is fast, clean, and non‑destructive, making it ideal for routine QC as well as advanced development work.

Measure flat sheet membranes accurately with this POROLUX™ step‑by‑step video. Learn sample prep, mounting, and analysis for reliable pore size results.
See how simple and stable flat sheet testing can be
If you work with flat sheet membranes, you know how sensitive they can be. A tiny wrinkle, a drop too much wetting liquid, or a bad seal can throw off your results.
This short video shows you exactly how to handle flat sheet samples so you get clean, reliable pore size data without the usual trial‑and‑error. It’s a quick, practical look into how flat sheet testing works on a POROLUX™ — filmed directly in the lab so you can see the process as it really happens.
What you can take away from this video
See how to prep flat sheet samples so they sit perfectly flat and sealed.
Learn how much wetting liquid you actually need (and what happens if you use too much).
Discover the simple placement tricks that make a big difference for stable results.
Understand how the POROLUX™ workflow helps you avoid inconsistent runs.
Get a sense of how flat sheet testing fits into membrane development, QC, and research.
This walkthrough is especially helpful if you work with microfiltration, ultrafiltration, RO prototypes, or experimental membrane materials.
Fast overview of the workflow
Step 1: Trim and prepare the membrane
A clean, even edge helps the membrane sit flat and seal properly.
Step 2: Add just the right amount of wetting liquid
Flat sheets can over‑absorb, so a thin, controlled layer works best.
Step 3: Place the membrane into the flat‑sheet holder
The video shows how to avoid wrinkles and create an even seal.
Step 4: Start the measurement in the POROLUX™ software
Choose the method that matches your material and hit start — no complicated setup.
Step 5: Look at your results
The FBP, MPD, and distribution curve give you a quick snapshot of membrane structure and performance.
Why pore size testing matters for flat sheet membranes
Flat sheet membranes are all about performance — whether you're targeting flow, selectivity, or structural consistency. Small variations in pore size can shift performance in a big way.
POROLUX™ porometers help you catch these changes early, compare batches, or fine‑tune your development process.
And because porometry is non‑destructive, you can keep testing the same sample until you get all the data you need.
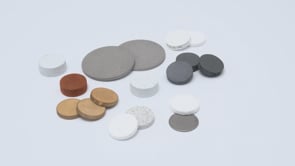
Learn how to measure ceramic and metal membranes with the POROLUX™ porometer. See sample prep, sealing, and analysis steps for accurate pore size results.
How to measure ceramic & metal membranes with the POROLUX™ Porometer
See how to test rigid membranes with confidence and precision
Ceramic and metal membranes behave very differently from polymeric materials — they’re rigid, robust, and often used in demanding filtration environments.
This video shows you exactly how to measure these materials using the POROLUX™ porometer, from preparing the sample to achieving a solid, leak‑free seal.
You’ll see how the workflow looks in the lab and what to pay attention to when working with membranes that don’t bend, compress, or absorb liquid the same way softer materials do.
What you can take away from this video
Learn how to prepare ceramic and metal samples for accurate pore size testing.
Understand why rigid materials require perfect surface contact for sealing.
See how to distribute wetting liquid evenly across a low‑absorption surface.
Avoid slipping, tilting, or edge leaks during mounting.
Get a clear sense of how POROLUX™ handles industrial‑grade membranes.
This video is especially useful for users working in chemical processing, wastewater treatment, high‑temperature filtration, and other industrial applications where ceramic and metal membranes are common.
Fast overview of the workflow
Step 1: Inspect your sample
A smooth back surface ensures a leak‑free seal.
Step 2: Apply wetting liquid
Rigid materials need careful, even coating.
Step 3: Mount the membrane in the holder
The video shows how to seat the sample so it doesn’t shift under pressure.
Step 4: Start the test
Choose the pressure range that fits your membrane type.
Step 5: Review pore size results
The data helps you evaluate structural integrity and filtration behavior.
Why pore size testing matters for ceramic & metal membranes
These membranes are often used in extreme conditions — high temperature, aggressive chemicals, high pressure.
Knowing their pore size characteristics helps you evaluate durability, consistency, and filtration efficiency before the membrane goes into real‑world use.
Porometry gives you a fast and non‑destructive way to compare materials, validate suppliers, or monitor production stability.
For rigid materials, having a reliable and repeatable testing method is essential — and that’s exactly what the POROLUX™ provides.
Extra resources for better results
POROLUX™ brochures
Sample preparation guide
Tips for getting the best seal on rigid materials
These resources help you understand how porometry interacts with stiff, non‑compressible membranes.
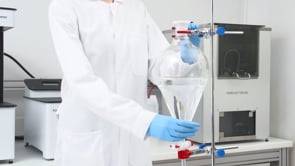


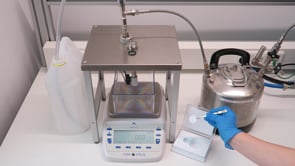

Nonwoven materials can be tricky to measure, especially when consistency and accuracy really matter.
This short video gives you a clean, real‑lab demonstration of how to get trustworthy pore size results with a Porolux porometer.
Whether you're in R&D, QC, or evaluating new testing equipment, this guide shows you exactly how simple and effective the process can be.
Watch the video below to see the workflow from start to finish.
How to measure nonwoven samples with POROLUX™
Nonwoven materials can be tricky to measure, especially when consistency and accuracy really matter.
This short video gives you a clean, real‑lab demonstration of how to get trustworthy pore size results with a POROLUX™ porometer.
Whether you're in R&D, QC, or evaluating new testing equipment, this guide shows you exactly how simple and effective the process can be.
Watch the video below to see the workflow from start to finish.
What you can take away from this video
See how to cut and prepare nonwovens so they sit flat and seal properly.
Learn how to get the right wetting level — not too little, not too much.
Understand what makes a good seal for fluffy or compressible materials.
Avoid measurement issues caused by wrinkles or trapped air.
Get confident with the overall POROLUX™ workflow for flexible materials.
This guide is ideal for filtration media, hygiene materials, medical nonwovens, and any application where pore size matters.
Fast overview of the workflow
Step 1: Prepare your nonwoven
A clean cut helps the sample seal evenly.
Step 2: Apply the wetting liquid
Consistency matters more than volume.
Step 3: Mount the sample
The video shows how to flatten soft materials without compressing them too much.
Step 4: Start your method
Just choose your settings and hit start.
Step 5: Check the results
FBP, MPD, and distribution curves give a clear picture of your material.
Why pore size testing of nonwovens matters
Pore size directly influences performance — from filtration efficiency and flow rate to batch‑to‑batch consistency. POROLUX™ porometers help you validate raw materials, optimize production, and ensure your nonwoven products meet the specifications your customers expect.
Porometry is fast, clean, and precise — without complicated sample prep or destructive testing.
Extra resources for even better results
Sample preparation guide for porometry
Application notes for nonwovens
POROLUX™ brochures (Revo and BP)
Poroliquid preparation help
These resources help you improve testing consistency and understand the science behind your results.